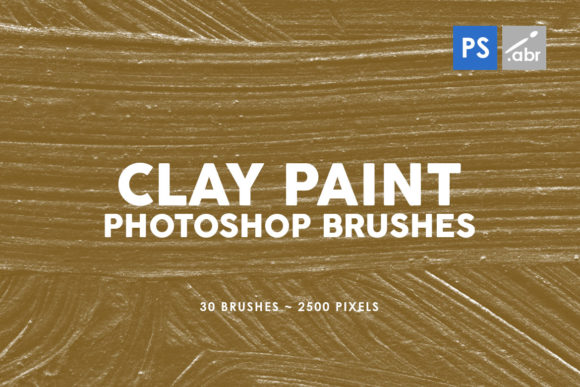
Unlocking Texture: A Practical Guide to Using 30 Clay Paint Photoshop Stamp Brushes
Digital art often suffers from a sterile, overly smooth appearance that lacks the tactile warmth of traditional media. Whether you are a graphic designer creating a vintage poster, a game developer texturing an environment, or a photographer looking to add depth to a portrait, the difference between a good image and a great one often lies in the texture. This is where the 30 Clay Paint Photoshop Stamp Brushes collection becomes an invaluable asset. Designed for compatibility across Photoshop CS2 through CC and beyond, these high-resolution tools offer a bridge between the digital canvas and the physical world of impasto and clay.
However, simply downloading a set of brushes does not guarantee professional results. Many creators, from beginners to seasoned freelancers, fall into common traps when integrating textured stamps into their workflow. By understanding the nuances of these specific tools, you can avoid wasted time and ensure your final output looks intentional rather than accidental.
Understanding the Toolset Beyond the Hype
At first glance, a brush pack might seem like a magic solution. The 30 Clay Paint Photoshop Stamp Brushes are not just simple stroke generators; they are high-resolution images, each sized at 2500 pixels. This resolution is critical. It means you can apply these textures to large-format prints or high-definition screens without losing detail or seeing pixelation. They function as photo overlays, digital manipulation elements, visual effects for games, or decorative accents.
The "clay paint" aesthetic implies a thick, organic application of color, reminiscent of stop-motion animation or hand-sculpted models. When used correctly, these brushes add a layer of sophistication that flat colors cannot achieve. Yet, a frequent misunderstanding is treating these stamp brushes exactly like standard round or soft-edge brushes. Because they are stamps, they deposit a pre-defined shape and texture with every click or drag. Misusing them by dragging too quickly or overlapping them without thought can result in a repetitive, tiled pattern that screams "digital filter" rather than "hand-crafted art."
Common Pitfalls in Texture Application
One of the most significant errors users make is ignoring the context of the underlying image. When applying clay textures as overlays, there is a temptation to crank the opacity to 100% and leave it there. This often obscures the subject matter, turning a nuanced photograph into a muddy mess. The goal of using these 30 Clay Paint Photoshop Stamp Brushes should be enhancement, not domination. A better approach involves using blending modes like Overlay, Soft Light, or Multiply to integrate the texture with the lighting and shadows of your base image. This preserves the details of your original work while imparting the desired tactile feel.
Another overlooked detail is the scale of the brush relative to the canvas. Since these brushes are fixed at 2500 pixels, using them on a small web banner versus a massive billboard requires different handling. Beginners often resize the brush tip dynamically without realizing that extreme downscaling can sometimes soften the unique grain of the clay texture, while extreme upscaling (if the software allows interpolation) can introduce artifacts. Always check how the texture looks at 100% zoom before committing to a full render.
Furthermore, many users fail to vary their application. Because this pack contains 30 distinct variations, there is no excuse to use the same three stamps repeatedly. Relying on a single brush stamp creates a recognizable rhythm that breaks the viewer's immersion. In game artwork or conceptual design, this repetition can make environments feel artificial. To maintain realism, rotate your stamps, adjust their flow, and mix different brushes from the set to create a chaotic, natural distribution of material.
Maximizing Efficiency and Quality
For entrepreneurs and small business owners managing their own marketing materials, time is money. A common inefficiency arises when creators do not organize their workspace before starting. Before diving in, take a moment to curate a subset of the 30 Clay Paint Photoshop Stamp Brushes that fit the specific mood of your project. Are you aiming for a rough, unfinished look or a polished, glazed ceramic feel? Selecting the right five or six brushes from the thirty available can streamline your decision-making process during the creative phase.
It is also vital to consider the color interaction. Clay paint is rarely a single flat hue; it has highlights and shadows within the texture itself. If you apply a dark clay stamp over a light background without adjusting the foreground color or using the "Color Dynamics" settings in Photoshop, the result may look pasted on. Experienced artists often sample colors directly from their artwork and apply the stamps with pressure sensitivity enabled (if using a tablet). This allows the texture to breathe, with lighter touches revealing less pigment and heavier presses building up the "clay," mimicking real-world physics.
Evaluating Compatibility and Usage Rights
Before purchasing or downloading any asset, including this specific brush set, verification is key. While these brushes are advertised for Photoshop CS2 through CC, users on very recent updates or alternative software like Affinity Photo or Procreate should verify import methods. Sometimes, legacy brush formats require a quick conversion step to function perfectly in the newest Creative Cloud versions. Ignoring this can lead to frustration when the brushes appear as basic circles instead of the detailed clay stamps you expected.
Additionally, consider the end-use of your project. If you are creating assets for a client or a product you intend to sell, ensure you understand the licensing terms associated with the brushes. Most high-quality stamp brushes allow for commercial use in finished designs (like a poster or a game sprite), but reselling the brush files themselves is almost always prohibited. Clarifying this early prevents legal headaches down the road, especially for freelancers building a portfolio of client work.
Practical Steps for Better Results
To get the most out of your 30 Clay Paint Photoshop Stamp Brushes, adopt a layered workflow. Instead of applying all texture to a single layer, create multiple layers for different textural elements. This gives you the flexibility to mask out areas where the texture distracts from the focal point. For instance, if you are editing a portrait, you might want the clay texture on the background and clothing but kept subtle or removed entirely from the eyes and skin to maintain clarity.
- Experiment with Blending Modes: Don't stick to "Normal." Try Hard Light for contrast or Color Dodge for glowing effects.
- Vary Opacity and Flow: Lowering the flow allows you to build up the texture gradually, giving you more control over the density of the clay effect.
- Combine with Masks: Use layer masks to erase parts of the stamp that interfere with important details in your composition.
- Rotate and Flip: Manually rotate the brush tip or flip the canvas horizontally occasionally to break up patterns and keep the eye engaged.
Ultimately, the value of this toolset lies in its versatility. Whether you are an educator demonstrating digital painting techniques, a blogger creating unique headers, or a hobbyist exploring mixed media styles, these brushes provide a robust foundation. The key is to approach them not as a shortcut, but as a sophisticated instrument that requires a steady hand and a discerning eye. By avoiding the trap of overuse and understanding the technical aspects of resolution and blending, you can transform flat digital compositions into rich, tactile experiences that resonate with viewers.
Remember, the best digital art often hides the fact that it is digital. When you successfully integrate these 30 Clay Paint Photoshop Stamp Brushes into your work, the audience should feel the roughness of the clay and the weight of the paint, forgetting entirely about the pixels underneath. That is the mark of true mastery.