Unlocking Creative Potential with 30 Decalcomania PS Stamp Brushes 3
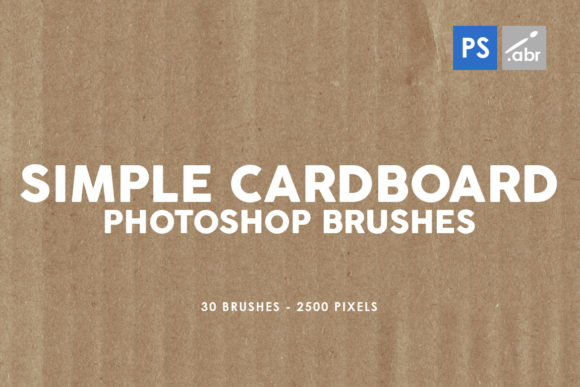
Digital art often hinges on the smallest details, the subtle textures that transform a flat image into something tangible and alive. For creators ranging from hobbyists to professional graphic designers, finding the right tools can mean the difference between a generic composition and a masterpiece. This is where the 30 Decalcomania PS Stamp Brushes 3 collection becomes an invaluable asset. Designed for compatibility across Photoshop CS2 through CC, these high-resolution stamp brushes offer a versatile toolkit for adding depth, grit, and artistic flair to your projects. Whether you are manipulating photos, designing game assets, or creating decorative elements for marketing materials, understanding how to leverage these specific brushes effectively is key to elevating your workflow.
Understanding the Value of High-Resolution Texture Stamps
The core appeal of the 30 Decalcomania PS Stamp Brushes 3 lies in their resolution and versatility. Each brush within this volume is crafted at 2500 pixels, ensuring that when you apply them to your canvas, they retain crisp detail even when scaled or used in large-format prints. Many beginners overlook the importance of brush resolution, often downloading low-quality presets that pixelate upon application, ruining the illusion of realism. By choosing a set specifically engineered with 2500-pixel dimensions, you safeguard your work against quality degradation.
These brushes function as more than just simple stamps; they are essentially pre-made visual effects ready for immediate deployment. You can utilize them as photo overlays to introduce wear and tear to a pristine image, apply them for digital photo manipulation to blend subjects seamlessly into new environments, or use them as decorative elements in branding projects. The "Decalcomania" style suggests a focus on transfer-like textures, grunge, and organic patterns that mimic real-world surfaces, making them ideal for artists seeking an authentic, tactile look in a digital space.
Common Pitfalls When Integrating Texture Brushes
Even with high-quality tools like Vol. 3 - Decalcomania Texture Photoshop Stamp Brushes, results can fall short if the application strategy is flawed. One frequent mistake creators make is applying texture brushes at full opacity immediately. This approach often overwhelms the underlying image, making the effect look pasted on rather than integrated. A heavy-handed application can distract the viewer and reduce the professionalism of the final piece. Instead, consider lowering the opacity of your brush or the layer itself. Building up the texture gradually allows for a more nuanced interaction between the brush stroke and the base image, creating a sense of depth that feels natural.
Another common oversight involves ignoring blending modes. Many users stick to the default "Normal" mode, which simply places the brush color on top of existing pixels. However, the true power of these stamp brushes emerges when you experiment with modes like Multiply, Overlay, or Soft Light. For instance, using a dark grunge stamp in Multiply mode will darken the underlying tones without obscuring details, perfect for adding shadows or dirt. Conversely, using a lighter texture in Screen or Overlay mode can introduce highlights and atmospheric haze. Failing to explore these options limits the utility of the 30 Decalcomania PS Stamp Brushes 3 and may lead to the incorrect conclusion that the brushes themselves are not effective.
Misunderstanding Scale and Context
Scale is a critical factor that is often misunderstood. Because these brushes are high-resolution, there is a temptation to use them at their maximum size immediately. However, context matters. A texture that looks incredible on a website banner might appear too coarse or distracting on a small social media graphic. Before committing to a design, always test the brush at the intended output size. If the texture feels too dominant, scale it down or reduce its frequency. Remember, the goal is to enhance the composition, not dominate it. Practical advice here is to create a test file matching your final project dimensions and trial several brushes from the set to gauge their visual weight before starting the actual design work.
Furthermore, some users treat these brushes as a one-size-fits-all solution, applying them indiscriminately across every project. While the 30 Decalcomania PS Stamp Brushes 3 are versatile, they possess a specific aesthetic—often gritty, organic, or worn. Using them in a project requiring clean, corporate minimalism might send mixed messages to your audience. It is essential to evaluate whether the texture aligns with the brand identity or the emotional tone of the artwork. For a sleek tech product launch, a subtle dust overlay might work, but a heavy grunge stamp could undermine the message of innovation and precision.
Optimizing Your Workflow for Better Results
To get the most out of this collection, adopt a structured approach to your creative process. Start by organizing your layers. When applying multiple stamps from the 30 Decalcomania PS Stamp Brushes 3 pack, place each major texture on a separate layer. This non-destructive workflow allows you to adjust opacity, masking, and blending modes independently later on. If you paint everything onto a single layer, you lose the flexibility to tweak individual elements, which can be frustrating during client revisions or personal refinements.
Colorization is another area where creativity can flourish. These brushes typically load as grayscale or black, but they do not have to remain that way. By clipping a solid color adjustment layer to your texture layer, or by using the "Color Overlay" layer style, you can instantly match the texture to your project's color palette. This technique is particularly useful for game developers needing consistent environmental assets or marketers aligning visuals with brand guidelines. Ignoring this step forces you to search for colored textures elsewhere, wasting time when the solution is already within your existing toolkit.
Checking Compatibility and Installation
Before diving into creation, ensure your software environment is ready. Although these brushes support versions from CS2 to CC, installation methods can vary slightly between older and newer interfaces. A common friction point occurs when users fail to restart Photoshop after loading the new preset files, leading to confusion when the brushes do not appear in the panel. Always verify that the .abr file is loaded correctly via the Brush Preset picker. Additionally, if you are working on very large canvases (e.g., billboards), ensure your Photoshop performance preferences are optimized to handle the 2500-pixel brush tips without lagging. Adjusting your cache levels and memory usage can prevent slowdowns when stamping complex textures repeatedly.
Finally, consider the legal and ethical aspects of using stock resources. While this set is designed for broad usage, always review the specific license terms included with the download, especially if you are creating assets for resale, such as game templates or print-on-demand products. Understanding the boundaries of usage protects you from potential intellectual property issues down the line. Most reputable brush sets allow for commercial use in finished works, but redistributing the raw brush files is typically prohibited.
In summary, the 30 Decalcomania PS Stamp Brushes 3 offer a robust solution for adding professional-grade texture to digital projects. By avoiding common mistakes like improper opacity settings, neglecting blending modes, and misjudging scale, you can harness the full potential of these tools. Whether you are a freelancer looking to speed up your workflow or an educator demonstrating digital techniques, approaching these brushes with intention and technical awareness will yield superior, visually compelling results. Take the time to experiment, layer thoughtfully, and integrate these textures seamlessly to bring your digital visions to life with authenticity and style.