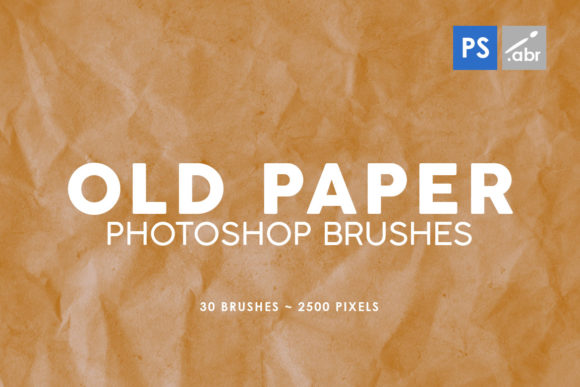
30 Old Paper Photoshop Stamp Brushes 2 Guide
Adding texture to digital art can often feel like the missing piece that separates a flat design from something with depth and character. This is where 30 Old Paper Photoshop Stamp Brushes 2 comes into play, offering a straightforward solution for creators who want to infuse their work with a vintage, tactile feel without needing complex layering techniques. These tools are designed to be versatile, working seamlessly across various versions of Adobe Photoshop, from the older CS2 up to the latest Creative Cloud releases. Whether you are a seasoned graphic designer or just starting your journey into digital manipulation, having access to high-quality textures can dramatically speed up your workflow and elevate the final output.
The core appeal of this specific brush set lies in its resolution and ease of use. Each of the thirty brushes included is rendered at a substantial 2500 pixels in size. In the world of digital assets, size matters immensely. A low-resolution stamp often looks pixelated or blurry when scaled up for a print project or a high-definition screen. With these larger dimensions, you have the flexibility to apply the texture to large backgrounds, posters, or detailed illustrations while maintaining crisp edges and authentic grain. This makes them a reliable choice for both web graphics and physical print materials where clarity is non-negotiable.
Why Texture Matters in Modern Design
In an era where digital perfection is the default, there is a growing appreciation for imperfection. Clean vectors and smooth gradients are useful, but they can sometimes feel sterile or impersonal. Introducing the look of aged paper, worn edges, or subtle grunge brings a human element back into the composition. The VOL.2 - OLD PAPER PHOTOSHOP STAMP BRUSHES collection addresses this need by providing pre-made elements that simulate real-world surfaces. Instead of spending hours scanning actual paper or hunting for stock photos that might not fit your lighting conditions, you can simply stamp these textures directly onto your canvas.
This approach solves several common problems for creators. First, it saves time. Creating realistic wear and tear manually requires advanced masking and blending skills. Second, it ensures consistency. When you use a set of brushes from the same volume, the tonal range and style match perfectly, preventing your design from looking disjointed. For marketers and small business owners creating social media content, this means producing professional-looking visuals quickly, which is essential for maintaining an active online presence.
Practical Applications for Every Creator
The versatility of these brushes allows them to fit into a wide array of projects. One of the most popular uses is as photo overlays. If you have a modern portrait or a product shot that feels too clean, applying one of these old paper stamps with a blending mode like "Multiply" or "Overlay" can instantly give it a nostalgic atmosphere. This technique is particularly effective for wedding photographers creating album designs or historians compiling digital archives where a sense of age adds emotional weight.
For those involved in digital photo manipulation, these brushes serve as excellent integration tools. When combining two different images, such as placing a subject into a new background, the lighting and texture often don't match. Stamping a paper texture over the entire composite helps unify the elements, making the final image look like a single, cohesive photograph rather than a collage. Game developers and concept artists also find value here, using these assets to create visual effects for user interfaces, inventory screens, or background environments that require a rustic or historical aesthetic.
Bloggers and content creators can use these decorative elements to break up text-heavy posts. A subtle paper texture behind a quote or a header can make the content more engaging and readable. Educators designing worksheets or presentation slides can utilize these brushes to create handouts that feel less like standard computer printouts and more like curated learning materials. The possibilities extend to packaging design as well, where a mockup might need a textured label to convey an artisanal or organic brand identity.
Getting Started with Volume 2
If you are new to using stamp brushes, the process is refreshingly simple. Unlike standard painting brushes that rely on pressure sensitivity and stroke direction, stamp brushes act more like rubber stamps. You select the tool, choose the specific brush tip from the list of 30 options, and click once on your canvas to apply the image. Because these are part of Volume 2, they likely offer variations distinct from previous sets, perhaps featuring different levels of distress, tear patterns, or fiber densities.
To get the best results, consider the following steps:
- Adjust Blending Modes: Rarely will you want the texture to sit opaquely on top of your work. Experiment with blending modes in the Layers panel. "Multiply" darkens the underlying colors, great for simulating ink on paper, while "Screen" lightens them, useful for dust or light leaks.
- Play with Opacity: Full opacity can sometimes be too harsh. Lowering the opacity to 30% or 50% often creates a more subtle, integrated look that enhances rather than overwhelms the original image.
- Use Layer Masks: If the texture covers an area you want to keep clean, such as a face or a logo, add a layer mask to the texture layer and paint with black to hide the effect in specific spots.
- Colorize the Texture: Although these are old paper styles, they don't have to remain sepia or gray. Use adjustment layers like Hue/Saturation to tint the texture to match your brand colors or the mood of your artwork.
Important Considerations Before You Begin
While these brushes are powerful, understanding their limitations and requirements ensures a smooth experience. Compatibility is a key factor; fortunately, this set supports a broad range of software versions, from Photoshop CS2 to CC. This inclusivity is vital for freelancers or students who may not have the latest subscription plan but still need professional tools. However, always ensure your software is updated to avoid potential glitches with newer file formats.
Another consideration is the context of your project. While an old paper texture adds charm, it isn't suitable for every design. Corporate reports requiring a sleek, ultra-modern look might suffer from the addition of grunge elements. It is important to exercise judgment and use these tools to support the message of the design, not distract from it. Additionally, because these are high-resolution images (2500 pixels), they do take up more memory than smaller brushes. If you are working on a computer with limited RAM, try to apply them on separate layers that you can merge once you are satisfied with the placement to keep your file size manageable.
Ultimately, the value of 30 Old Paper Photoshop Stamp Brushes 2 lies in its ability to bridge the gap between digital precision and analog warmth. It provides a toolkit that is accessible enough for beginners to achieve immediate results, yet robust enough for professionals to incorporate into complex workflows. By adding these decorative elements to your library, you expand your creative vocabulary, allowing you to tell richer stories through your visuals. Whether you are crafting a game asset, designing a marketing flyer, or simply experimenting with personal art, these brushes offer a reliable way to add that extra layer of authenticity that audiences connect with.