Mastering Your Digital Layouts with Procreate Grid Brushes Stamp
Digital planning and illustration have revolutionized how we organize our lives and create art, but the transition from physical paper to an iPad screen often feels sterile. Many creators struggle to replicate the tactile warmth of a real notebook. This is where the Procreate Grid Brushes Stamp collection becomes an essential tool in your digital arsenal. By integrating specific grid, lined, and dotted textures directly into your workflow, you can instantly transform a blank canvas into a structured, realistic workspace. However, simply downloading a brush set is not enough; understanding how to leverage these tools effectively while avoiding common technical pitfalls is what separates amateur sketches from professional-grade digital planners.
The Trap of Static Backgrounds vs. Dynamic Stamps
One of the most frequent mistakes beginners make when creating digital planners or worksheets in Goodnotes or Procreate is relying on static image backgrounds for their grids. Users often import a JPEG of graph paper and try to draw over it. The issue here is flexibility. If you need to change the color of the lines to match a theme, or if you need to resize the grid to fit a specific layout, a static image pixelates or loses quality.
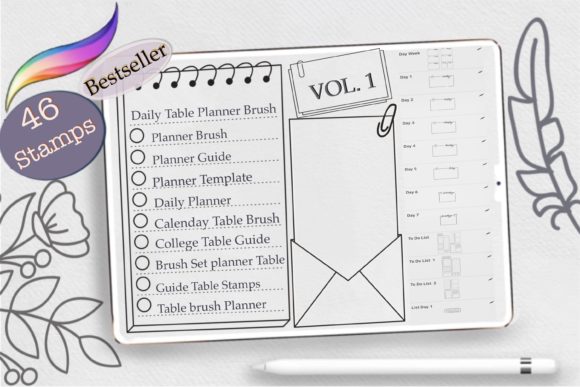
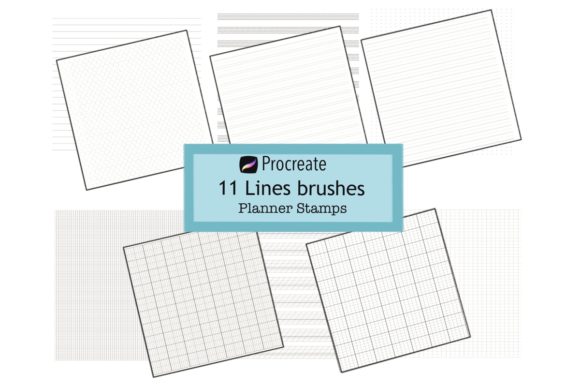
A superior approach is utilizing stamp brushes. Unlike standard drawing brushes that require you to drag your Apple Pencil across the screen, Procreate stamps allow you to tap and place a perfect instance of a grid, line, or music staff instantly. The 11 Lined brushes included in this specific set—ranging from standard lined paper to complex hexagon graphs—are designed to be scalable. You can resize them without losing crispness, adjust their opacity to ensure they don't compete with your handwriting, and recolor them to suit any aesthetic. Treating these grids as dynamic elements rather than fixed backgrounds gives you total control over your composition.
Misunderstanding Compatibility and Software Limitations
Before you dive into creating your next masterpiece, it is crucial to address a significant misunderstanding regarding software compatibility. A common frustration arises when users purchase specialized brush sets expecting them to work across all digital art platforms. It is important to note that these Procreate grid brush tools are engineered exclusively for the Procreate app on iPad. They will not function in Photoshop, Clip Studio Paint, or even directly within Goodnotes as editable brushes.
This limitation often leads to confusion and wasted time for those who do not read the product specifications carefully. If your primary workflow involves typing directly into Goodnotes without prior setup in Procreate, you might find these stamps unusable in the way you intended. The correct workflow involves designing your template pages in Procreate using these stamps, exporting them as PDFs or images, and then importing those finished pages into Goodnotes or your planner app of choice. Recognizing this distinction early saves you from purchasing tools that do not fit your current software ecosystem.
Overlooking the Variety of Grid Types for Specific Tasks
Another oversight many creators make is assuming one type of grid fits all purposes. When building a comprehensive digital planner, using a single dot grid for every section can make the journal feel monotonous and functionally limiting. This collection offers eleven distinct variations, each serving a unique purpose that enhances usability:
- Lined Paper: Ideal for journaling entries where straight lines guide legibility without the distraction of vertical columns.
- Graph Paper (Variants 1-4): Essential for budget trackers, habit charts, or technical drawings where precise alignment is necessary.
- Music Note Staff: A niche but vital tool for musicians composing directly on their iPad.
- Dot Middle Line & Dot Grid: Perfect for bullet journaling, offering structure for headers while leaving the rest of the page open for freeform drawing.
- Hexagon Graph: Excellent for mapping out complex projects, molecular structures, or honeycomb-style habit trackers.
- Hand Writing & Calligraphy: These stamps provide pre-styled text bases that can speed up header creation.
Failing to utilize this variety results in a generic-looking planner. By strategically selecting the graph paper brush for financial pages and the music note stamp for creative logs, you create a user experience that feels bespoke and thoughtful.
Optimizing Opacity and Layer Management
Even with the right brushes, the final output can look amateurish if layer management is ignored. A frequent error is placing grid stamps on the same layer as your handwritten notes or illustrations. This makes editing a nightmare; if you want to move a paragraph of text, you might accidentally drag the grid lines with it, or worse, erase parts of your grid while correcting your writing.
To maintain a professional workflow, always place your Procreate stamps on a dedicated layer beneath your content layers. Furthermore, pay close attention to opacity. A grid that is too dark (100% opacity) creates visual noise that fights against your handwriting. Reduce the opacity of your grid layer to between 15% and 30%. This subtle adjustment ensures the grid provides guidance without dominating the visual hierarchy. This small tweak significantly improves the readability of your digital planner and makes your hand writing pop.
Streamlining Your Download and Import Process
Finally, let's address the practical side of getting started. Many users encounter hurdles immediately after purchase due to unfamiliarity with the iOS file system. When you receive your instant download, it typically arrives as a .zip file containing a .brushset file. Do not attempt to open the zip file inside the Procreate app itself. Instead, use the Files app on your iPad to locate the download, tap it to unzip, and then tap the .brushset file. This action should automatically trigger Procreate to import the new set.
If you skip the unzipping step or try to import individual brush files incorrectly, the stamps may not appear in your library, leading to unnecessary support tickets and frustration. Once imported, navigate to the Brush Library, find your new set, and remember: these are stamps. There is no need to drag. Simply select the brush, adjust your size and color, and tap the screen. This "tap-to-place" mechanic is the key to speed and efficiency.
By understanding the specific capabilities of these tools, respecting software limitations, and organizing your layers correctly, you can elevate your digital planning from a simple hobby to a highly efficient, professional practice. Whether you are an educator creating worksheets, a freelancer managing client projects, or a hobbyist documenting your life, the right grid makes all the difference.